
Showing posts with label wood. Show all posts

Wednesday, November 25, 2009

Wooden Block projects

I got together with some of my friends and we did a craft with wooden blocks for thanksgiving we got the idea from here.

Picture 127

I had some blocks leftover and my husband wanted to do a project and we came up with this tree:

Picture 317

We painted the blocks ( sizes range from 2 1/2” to 3 1/2”). Then we laid the blocks down on the table and printed out a tree outline from the computer, laid it over all the blocks and painted the tree outline onto the blocks. Then I used a stencil to add the star to the top (this required a lot of coats to cover up the green).

Picture 252

I cut out the vinyl letters using my Cricut and a program called Sure Cuts A Lot that allows me to cut using all the fonts on my computer.

As I was looking at it I thought it needed a little sparkle to it and since I didn’t have any super fine glitter I decided to use my bronzing powder and then use a clear gloss spray over the top to keep it on. It worked out great! Just a little shimmer.

Picture 275

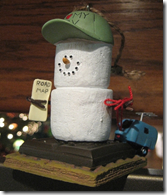
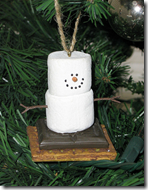
I then used the two lonely blocks to make a snowman from which my inspiration came from these cute little S’mores snowmen.image image
Here he is with his crocheted hat and scarf!!!

Picture 266

The top block is 2 1/2” x 2 1/2” and the bottom block is 3'” x 2 1/2”. I painted the block white and then glued them together. I then went along the edges with a gold stamp pad:Picture 265

I hand panted on his eyes and buttons and for his mouth I used the tip of the handle of a small paintbrush to make the circles. I used a 1/4” dowel for his nose and I just sanded at one end for a little while to get it to make the point like a carrot and then used a sharpie to make the lines. Then I sprayed it with a clear gloss spray paint.

It was fun to do these projects with my husband!

Picture 319

I had a question about where I purchased the blocks for my snowman and tree, I bought a 2.5" x 1.5" x 8' board at Home Depot and then my neighbor cut them to size. You could also have the associates at Home Depot cut them for you too. It was less than $2 for the board.

Saturday, November 14, 2009

Homemade Christmas Gift Ideas

I'm going to be diving into the Christmas season by starting to post ideas I've found around the blog world and also the one's I'm thinking of doing. To start off I found this cute idea over at My Good Finds  of these fun Family Blocks.

image 

Notice the wires on the top to hold pictures.  What a fun idea!

Wednesday, November 4, 2009

Hair Bow Holder

My friend Tana and I have been going a little crazy with making hair bows for our daughters and so my daughter’s  hair bow holder was over flowing.  It was just a quick one I made by covering up a piece of cardboard with some fabric and two lines of ribbons.  So I took this old frame I had and attached the ribbons to the inner layer of the frame and then covered the back up with some fabric (not the cutest fabric but it will work).

Picture 038

I first used hot glue to attach the ribbon, then I put a staple through it and then topped it with more hot glue.  Using the hot glue helped hold the ribbon tight and will hopefully prevent the ribbon from tearing.

Picture 039

I then stapled the fabric down and then covered each stable with hot glue and around the edges on the fabric.

Picture 040

Almost done….

Picture 041

Then I added another ribbon on the bottom so her headbands could hang with the bows.  I stapled one end down and then used Velcro to hold the other end.

Picture 042

Here it is!!!  Back in it’s home!!!

Picture 043

Friday, October 23, 2009

Sweetheart Wood Clock

Here’s my latest creation now available in my Etsy shop.  The heart I will customize with initials to say for example “DB + KH”.

Wood Clock  081 kraftymum blog

Wood Clock 088

Friday, October 9, 2009

Ribbon Holder

I made myself a ribbon holder. All I used was 4 Carnation Instant Breakfast Canisters, 2 wood dowels (1/4” x 12”),scrap wood, scrapbook paper, and paint.

picture 035

I cut the wood into 2 strips 3” x 15” and 2 strips 3” x 12”. Then I cut what was suppose to be just an “L” shape but I messed up on one strip and had to cut “T” shapes for it to work right.

picture 037

I then used wood glue and some nails to put the frame together and painted it.

picture 049

In between coats of paint I worked on the actual holders. I cut the metal part off the bottom of each canister and then stuck two together with duck tape. Then I punched holes into the lids for the dowel to go through.

picture 045

Then I covered the canisters using Mod Podge and scrapbook paper. Then using an x-acto knife I cut a slit for the ribbon to come out of.

picture 076

A couple of coats of varnish and the ribbon in place and she’s ready to hang!! I’m now one step closer to an organized office/craft room.

picture 077 picture 078

I'm participating in:

Thursday, July 16, 2009

Re-Do of wooden heart hangers

I had purchased these hearts unfinished at hobby lobby for $1 a piece and then Modge Podged scrapbook paper on them for my daughter but they never went to use so I decided to re-do them. Sorry I didn't get a before picture.
I wanted to use them in my bathroom to hang the kids' hooded towels on and our bathroom is in black and white decor.

I didn't like how bold the lines were when I was done so I scratched them up with sandpaper.
I then finished it with a Polyurethane finish.
Here they are on the wall with the rest of the decor.
Doesn't exactly go along with the decor but they will work for now!
 

blogger templates | Make Money Online