Tuesday, July 6, 2010

Mini Swing

I was in the process of making a birdhouse when we received a call that we would be able to move into a new place that is closer to family about 5 months earlier than we had anticipated.  So the birdhouse has been put on hold, but I wanted to make a little something to put by our little Anthony’s grave since we will be moving over 300 miles away.  I thought about making a smaller birdhouse, but then came up with this cute little swing instead.


Even though we will be so far away from the place we laid his body to rest, we know he will always be with us!!!

Wednesday, June 30, 2010

My first paid sewing project…Baptismal Dress

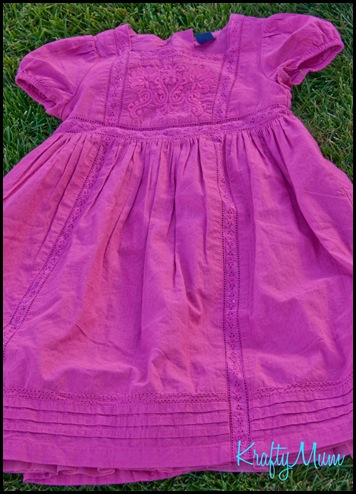
A friend of mine asked me a couple of months ago if I would be able to make a dress for an 8 year old little girl similar to the Baby Gap dress she had for her 3 year old.
030
They had been looking all over and couldn’t seem to find a cute all white dress.  So I took a look at the dress and told her I could do it.  I found a pattern and made the alterations so I could include the cute lace trimming  throughout the dress and then added a little flower appliqué.
027-3
Here’s the full  dress.
026-2
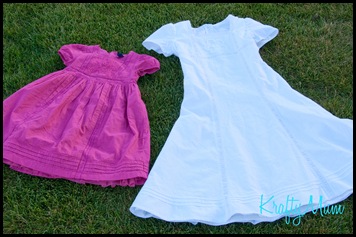
Here are the two dresses together.  I had a lot of fun doing the flower appliqué and will probably be incorporating it into more of my projects!   
028

Saturday, June 26, 2010

Facebook Fan page

I have a new Facebook Fan page.  It’s going under my Etsy Store’s name of Click and Stitch.  Head on over and become a fan.  I’m not real good at making a lot of posts there but you’ll be able to see when I have new items available in my shop!!!

CAS Icon

Tuesday, June 22, 2010

A “Twist” on Zipper Rosettes

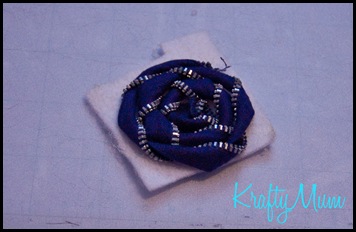
I got together with some of my friends today to make zipper rosettes.  They are so much fun and easy to do.  Then I started fiddling around and came up with this “TWIST” on the rosettes!!!
037
Materials:
Zipper
Hot Glue Gun
Felt
Instructions:
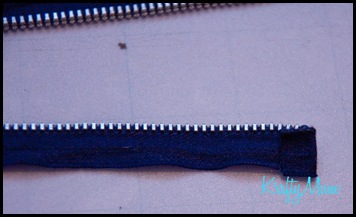
Undo your zipper completely cutting off the end so you can remove the zipper head.  So it looks like this:
010
Then fold the excess fabric at one end over and glue it in place.
014
Fold the end tightly over and glue it in place onto a square of felt.  The size of your felt with depend on how long your zipper is.  It’s better to have too much felt then not enough.
015
Now twist the loose end of your zipper.
019
Twist it pretty tight and then start gluing it down to the felt.
022
You’ll keep twisting and putting some glue down to hold it in place rotating all the way around several times.  When you get to the end just glue it down.  Once your glue is cooled off and dry trim the excess felt away and then add some more glue where the zipper lays a little loose still.
024
Now you can attach it to whatever you want, just like the other zipper rosettes.  I made two smaller ones and attached them to a headband. 
This was my attempt at taking a picture of me wearing the headband, but then I gave up and convince my daughter to put it on and let me take a picture!!!
027


giveaways

Monday, June 14, 2010

Patriotic Star Door Decor

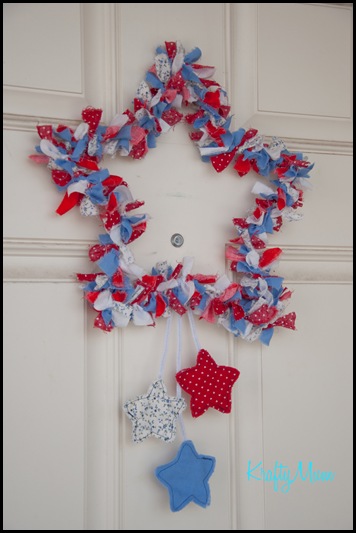
My door has been sitting empty of any decor since Christmas was taken down.  So I decided to put something together that wouldn’t take much time and that I could do while chilling with the kids outside.  I came up with this cute arrangement:
034
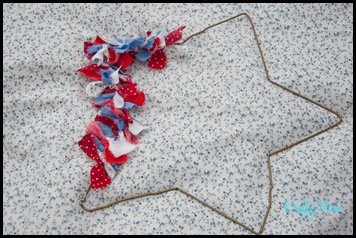
It’s styled after all those wreaths we saw around Christmas time with the scrap fabrics just tied around a wire.  For mine I used a wire coat hanger.  To make the even points I measured approximately how long my hanger was after undoing the twisty part at the top.  Then I divided that number by 10 because that is how many bends I was going to need to make to get my 5 points.  So say your wire measured at 42 inches.  That means you need to make a mark every 4 inches for a bend (the extra 2 inches will just be worked in at the end as an overlap to connect the two ends together).  You will want to alternate your bends back and forth in a zig-zag like method.  Since my hanger had a natural curve in a sort of circle I did one bend inwards and one bend outwards.  I really hope I’m making sense.  Once you reach the end twist the two ends together.  This is a little difficult and may require a pair of pliers and perhaps an extra set of hands.
003
Now just start forming your bends more distinctly so you have a more pronounced star look. 
Gather up your scrap fabrics you want to use.  I used 2 different red, 2 different white, and 1 blue.  I tore my fabric into about 1 inch strips and then cut them into 3-4 inches long sections. 
012
Once your strips are ready just start tying them in a knot around the star.  I chose to pattern mine as red, white,blue (and then just alternated between the two different reds and whites).
006
The closer together you squish the tied fabrics the fuller your star will appear.  After I had my star all done I took it out to display and decided that my star a little lonely and out of place. 
013
So I gave her three little stars friends to hang out with. 
To make the friends I sketched a star that was about 2-3 inches tall.  I cut two stars of each of the three fabrics I chose (6 total stars).  Then I just did a 1/4” stitch around the edges of two stars wrong sides together.  To make the fray look on the stars I brushed my fingers over the edges.
039
I attached the stars using white pipe cleaners/chenille stems and hot glue.  For the red and the white star I put a little bit of hot glue on the inner point and attached them to the middle pipe cleaner to help them lay how I wanted. 
That’s it.  It probably took me about 2 hours and most of that was spent sitting and tying all the little strips.
My door is happily decorated, for now…….
034


giveaways
 

blogger templates | Make Money Online